Showing posts with label Strawberry. Show all posts

Monday, August 13, 2012

Mini Vanilla & Chocolate Tarts


I've realized not too long ago that I'm pretty much obsessed with all desserts that are made in individual servings. And I simply love anything that's a miniature version of its original form. I convince myself that I'm not consuming as many calories when I have a mini cupcake, a mini apple pie, or brownies cut into tiny pieces it would be criminal to have just one. Everything's cuter when it's mini anyway. Like kittens, puppies and humans; I wouldn't advise those to be consumed though...


This brings me to a treat I like to make which is not necessarily tiny but is meant for single servings: tarts! I first started making these tarts in 2009 when I decided I wanted to try making tart crust/dough from scracth, on my own. Since then, I've learned to follow instructions better and I am now able to make crust which is light and flaky. A personal achievement! Really, anyone can make tart crust/dough, it just needs a little bit of patience and some gentle + cold hands (or a food processor if you don't like to make it by hand).


I would say that this is a fairly easy recipe to follow but is time-consuming especially if you are a beginner at making pastries. However, the results always turn out great - even if your tart crust doesn't turn out as flaky as you'd like, it will still always taste good. Practice makes perfect and I myself am still practicing to perfect this technique. After all, we're just baking to put a smile on someone's face and satisfy that sweet tooth! These tarts are great for parties or gatherings; I've baked them for a picnic and several gatherings in the past and they've always been quite a hit. I made these particular ones for my friend Wajiha who kindly invited me to her place for iftar where her mom cooked up a [delicious] storm.


I had a lot of fun decorating the chocolate tarts. Melted some chocolate and piped out flower shapes then topped them off with edible glitter.


There are so many ways to decorate tarts. I've topped the vanilla ones with berries, kiwis, and pineapples, the possibilities are endless. For the chocolate tarts, if I need something quick to top them off with, I chop chocolate and sprinkle it on top or you could even use sprinkles of your own choice. Again, it's totally up to you and what you come up with! :)

Tarts adapted from Fatafeat Magazine's Houriyat Al Matbakh
makes 25-30 tarts

Tools you'll need:

Pastry cutter (optional)
2 or 3 cupcake/muffin tins (This varies with everyone, depending on how much dough you end up with and how thick/thin you roll it out)
Cupcake/muffin liners or papers
Rolling pin
Round cookie cutter, about 3 inches in diameter
Dry beans or dry lentils or pie weights. These will be used for blind baking.

For the crust:

200g all-purpose flour
a pinch of salt
1/4 teaspoon baking powder

125g unsalted butter, fridge cold
120g sugar
1 large egg
1 teaspoon vanilla extract

butter spray or softened butter
  • In a large bowl, sift the flour, baking powder and salt
  • Cut the butter into small cubes and throw them into the flour mix. Using a pastry cutter, begin cutting the cubes of butter into the flour. Alternatively, you can use your hands: rub the mix between your hands so as to combine the butter and the flour. Keep doing this until your mixture looks like damp sand; little crumbles of dough. Whatever you do, do not knead. This will help you achieve that lovely light, flaky crust in the end.
  • In another bowl, beat the sugar, eggs and vanilla until it turns from a dark yellow into a pale yellow color and is fluffy.
  • Add the egg mix into the flour mix and fold it in. Again, do not knead the dough. Simply combine the wet and dry ingredients together; you can use your hands or a spatula, whatever you prefer.
  • If your dough still feels sticky, add more flour as you go. Continue doing this until your dough can hold its own and is formed into a ball.
  • Take a piece of cling foil and wrap your dough in it. Leave it to rest for 30 minutes in the fridge.
Assembling + Blind Baking:
  • Prepare 2-3 cupcake/muffin tins; spray a little bit of butter spray in each cup or if you're using softened butter, brush a thin layer of butter into each cup. Set aside.
  • Preheat your oven to 180°C
  • Take out the dough from the fridge, unwrap from cling foil. To make it easier for you to use, cut the ball of dough in half.
  • On a clean, flat surface which is lightly floured, roll out your dough with your rolling pin. Thickness of the dough is totally up to you, I prefer a crust that has a bit of a bite to it so I roll it out about 1/4 inch thick.
  • Using your round cookie cutter, cut out rounds; try using up as much dough as possible.
  • Take your round pieces of dough and fit each one in a separate cup in your cupcake/muffin tin. Use your fingers to push them into place and shape them as you wish. Don't worry if you mistakenly pierce little holes, just take a little piece of left-over dough and patch them up. Repeat this process till all your dough is done.
  • On top of the dough, place the cupcake/muffin papers or liners. Lightly push them into the dough. Now pour in your dry beans/lentils/pie weights and fill the papers about 2/3 to ensure they weigh down the dough.
  • Bake in the oven for 15 minutes or until you can see the edges of your dough turn a nice golden color.
  • Take out the cupcake/muffin tins from the oven. Carry out the cupcake/muffin papers or liners filled with the dry beans/lentils/pie weights. I don't throw away my dry beans as I can use them again for the next time I bake a pie or tart.
  • Switch off your oven's bottom burner and light up the top burner. Put the cupcake/muffin tins back in the oven and bake for just 5 minutes. Be careful not to burn your tart shells, this is just to lightly bake the tops which weren't previously exposed to heat.
  • Remove your baked tart shells from their tins and allow them to cool on a rack while you make the filling.
For the filling:

700ml milk, at room temperature
120 g sugar
2 eggs, at room temperature
1 teaspoon vanilla extract
60g corn flour
100g dark chocolate, broken into small pieces or chocolate chips*
  • In a large saucepan on medium heat, heat the milk till it simmers. Set aside for a bit.
  • In a bowl, beat the eggs with the sugar and vanilla until it is a pale yellow and becomes fluffy. Then add the corn flour and slowly beat that into the egg mix.
  • Spoon in about 3 spoonfuls of the heated milk into the egg mix and mix together.
  • Now add the egg mix to the rest of the milk in the sauce pan and return to medium heat.
  • Constantly stir the mix, do not leave it unattended as it can curdle.
  • Keep doing this until your filling reaches a thick consistency; it should have an egg custard-like texture.
  • Remove from heat and transfer to a bowl to cool down. *[For chocolate tarts, I separate half the ready filling into another bowl and while it is still hot, I add the chopped chocolate which melts with ease. And viola, you have chocolate filling!] 
  • Once it is at room temperature, you can either spoon the filling into your tart shells or put it in a pastry bag and pipe it with a star tip.
  • Top off vanilla tarts with fruits of your choice and the chocolate tarts with sprinkles or little pieces of chocolate, or whatever you prefer. Place them in an air-tight container and pop in the fridge to cool.
  • Enjoy!

Happy Baking!

Tuesday, March 1, 2011

Swedish Summer Cake

Happy March!

Something about the beginning of a new month always gets me all excited. I find myself trapped in routine a lot so, to be able to turn the page to a new month is refreshing. March is looking like a pretty busy month so I'm looking forward to the chaos that I somehow seem to love so much. I know I'm going to regret this when I'm older.. But till then, let's keep baking!


Yet another recipe from the lovely Nigella Lawson. This is the wonderfully light Swedish Summer Cake from her cookbook Kitchen which has easily become a staple in our house. Why did I pick to bake this cake? It's a sponge cake with strawberries, whipped cream and vanilla flavored custard. How could I resist?


I barely use fresh vanilla beans since they're quite expensive. I had a few laying around in my pantry that I was meaning to use for a special recipe so I thought, why not use them for a big pop of flavor! And flavor it gave. I used one vanilla bean husk for the custard in this recipe.


Unfortunately, the first time I tried making this cake I didn't get enough batter. I guess the size of my pan was a lot wider than what was called for in the recipe. So all of the steps shown in this post are from what's originally called for in the recipe. I decided to bake it with a double dosage the next time and ended up with a three-layered cake! I was a happy red panda, yessir!


Sure, it was way shorter the first time but it tasted the same if not better. Simply loved this cake!


If you're not one for baking or maybe a little short on time, I'm taking orders! So please feel free to contact me at least 2 days in advance.


Swedish Summer Cake from Nigella Lawson's Kitchen

Vanilla Custard 

2 egg yolks
2 x 15ml tablespoons caster sugar
2 teaspoons cornflour or potato flour
250ml full-fat milk
½ vanilla pod or 1 teaspoon vanilla extract
  • If using the vanilla pod, put everything in a pot over a low to medium heat, stirring non-stop, until it starts to thicken. Do not let it boil. If using the vanilla extract, put everything in except the extract and proceed as above.
  • When it starts to thicken - just over 3 minutes at medium heat, but just under 5 if you keep the flame cautiously low - take it off the heat. Remove the vanilla pod, if using.
  • Transfer to a cold bowl, mix in the vanilla extract, if using, and continue stirring until it is a little cooler, then cover with clingfilm - touching the surface of the custard - to stop the custard getting a skin when it's cold. Or wet a piece of baking parchment and place that right on top of the custard.
The Cake

3 eggs

250g caster sugar
90ml hot water from a recently boiled kettle
1½ teaspoons baking powder
150g plain flour
butter, for greasing


1 x 23cm spring-form or other round cake tin
  • Preheat the oven to 180°C/gas mark 4 and line the bottom of the cake tin with baking parchment and butter the sides.
  • Whisk the eggs and sugar together briskly until pale and moussy and more than double in volume, then, still whisking but slightly more gently, add the hot water.
  • Mix the baking powder and flour in a separate bowl and gradually whisk these in, making sure there are no lumps. You may need to stop once or twice for a scrape-down.
  • Pour and scrape the mixture into the prepared tin and bake in the preheated oven for approximately 30 minutes, or until it is golden, well-risen and a cake tester comes out clean.
  • Let the cake stand in the tin on a wire rack for 5-10 minutes before - carefully - unmoulding and leaving it to cool on the rack.
To assemble the cake


750g strawberries
2-3 teaspoons caster sugar, depending on sweetness of berries
500ml double cream*
2 teaspoons vanilla extract*


*(If, like Red Panda, you prefer using the instant whipped cream sachets, skip these ingredients)
  • Put 250g strawberries to one side, and start preparing the remaining 500g. Hull these, halve the smaller berries and quarter the larger ones, dropping them into a bowl. Sprinkle with sugar - how much depends on how tart or sweet the berries - shake and leave until they glisten: 10 minutes will be just fine, though 1 hour would make them juicier and glossier.
  • Whisk the double cream and vanilla extract until it holds its peaked shape when the beaters are lifted out.
  • Fold a third of the whisked cream into the fully cooked vanilla custard you made earlier.
  • When the cake, too, is thoroughly cool, take out a bread knife and, courageously, slice the cake horizontally into 3 layers.
  • Put on cake layer on its serving platter or stand, and top with half the vanilla-custard-cream, then arrange half the macerating strawberries on top, concentrating more on the outer edges of the cake than the center. Top with the second layer of sponge and repeat as before with the rest of the custard-cream and cut berries.
  • Now set the third cake layer on top and cover with the waiting whipped cream, arranging the 250g reserved strawberries as desired: I hull most of them, and cut some, but like to have a few whole, unhulled berries lying plumply and decoratively here and there.

Red Panda's note: The first time I made this, I use the same proportions for the custard, cream and cake as mentioned above. But to get 3 nicely baked layers, I doubled all the proportions which gave me plenty of batter and custard to work with.


Happy Baking!

    Monday, January 24, 2011

    Mascarpone Cheesecake with Fresh Strawberry Drizzle

    I FINALLY found Mascarpone cheese in Dubai! Can I get a Hallelujah?! 

    All thanks to Wajiha (@wajihasaid) who pointed out that she always found some in Carrefour. I searched and asked around and surely, I found tubs full of them. Unfortunately they only had one brand available but thankfully, it tastes pretty good!


    I had initially used Tyler Florence's recipe for The Ultimate Cheesecake. I used mascarpone cheese instead of cream cheese and omitted the sour cream. That was a big mistake. It might seem obvious but I had no previous experience with mascarpone and never realized what a big difference it had in texture compared to cream cheese.

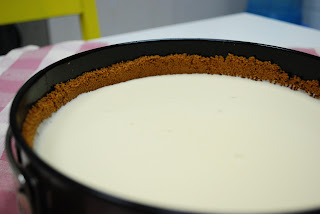
    The recipe should yield a good thick, creamy batter that will bake nice and fluffy in the oven after 45 minutes. But all I got was a liquid mixture. I decided to ignore it and just go for it. 45 minutes later, all I see is the same liquid mixture which is just slightly baked on the sides. I thought, "Alrighty... Maybe it's because the cheese is different. Another 10 minutes" So ten minutes later, still nothing. Then mom decided to save the day and suggest that I scoop out the mixture and cook it in a large saucepan with some corn starch. It turned out to have more of a pudding texture which explains why it looks a bit droopy.


    I also made fresh strawberry drizzle for the topping. My first time, too. Watched a few baking shows and saw how easy it was to make so decided to give it a shot.


    I was surprised at how good it turned out, I really didn't expect that kick that it had in it. The lemon zest went really well with the mascarpone cheese. I suggest you don't try making it the way I did with this recipe, search for some good mascarpone cheesecake recipes and give it a shot, it's worth it!